Today, I was once again in the situation that I wanted to hook up a prototype and started modeling some simple shapes in Blender. When I got to the step of actually baking shadow textures, I ran into the old “no objects or images to bake” error message. I remembered I had that one before but it took my quite some while to figure out the solutation once again. So this time, I’m going to do the proper thing and document it. Let’s start with the default Blender scene (I’m using Blender 2.5 by the way).
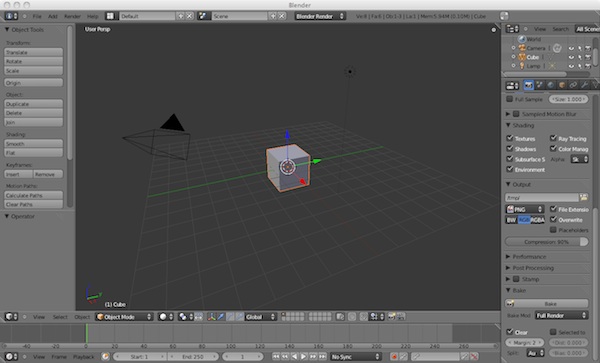
First thing we need is a UV-map. So switch to the
UV Editing
layout by clicking on the button to the left of “Default” in the top bar. With the mouse cursor over the right 3D view, right-click the cube to select it and press TAB to go to
edit mode
. Switch to
edge selection
mode, select the proper edges, press
space
and then choose
Mark Seam
. Press
A
two times to select all faces, press
space
and choose
Unwrap
. We now have our basic UV map.

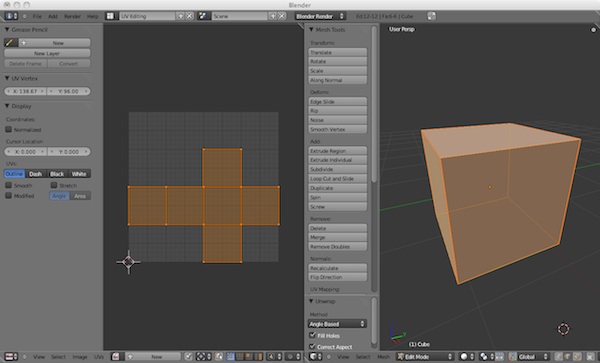
In the left view, press S and scale it down a bit. There should be a little space between the boundary of the grid and the edges of the UV map. This is done so blender can “overbake”, i.e. fill some extra pixels around the actual UV map area. This helps solving filtering problems which are produced by texture lookups using pixel that are outside of the UV-map part that is actually filled by triangles.
Now comes the important part. While still in edit mode, click on New (right of the “UV” menu point in the bottom bar) to create a new image. The background of the UV view will now turn black as the image is completely empty. This does two things: for one it creates an image and for the other it assigns it to the UV map. The “No object or image to bake” error usually comes when an image has been created but not assigned to the UV map!
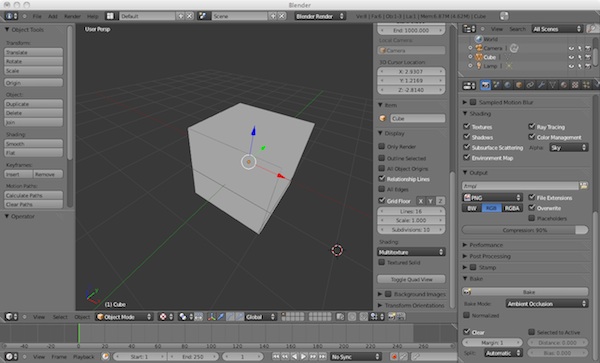
Switch back to the Default view layout. In the right menu bar, click on the camera to get to the rendering panel. At the bottom, switch the bake mode to Ambient Occlusion and press Bake. A progres bar appears at the top menu bar, but nothing else changes. Go back to the UV Editing layout to see the baked shadow texture (in this case everything is gray as there is nothing that could block the ambient occlusion). Note the star next to “Image” in the bottom bar. Press it and select Save Image As. Choose a name and location where to store the texture to.
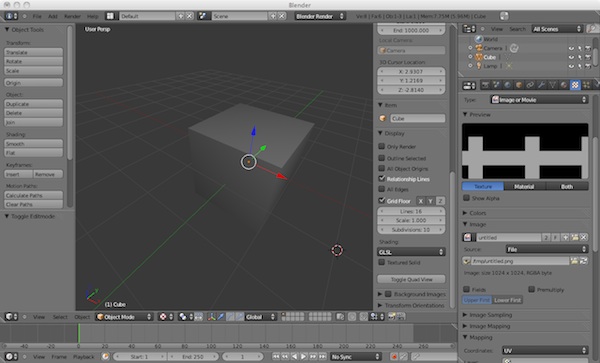
To see the shadow map applied to the cube, go back to the Default layout and click on the Texture panel button in the right menu (the small checker board icon to the right of the camera panel icon). On my Macbook, that button is of the screen and one has to grab the left boundary of the menu to extend the menu first. Under type choose Image, in the “Image” section click on Open and the shadow texture should becomes visible in the small preview window above. In the “Mapping” section, switch Coordinates from “Generated” to UV.
Finally, move the mouse cursor to the large 3D view and press N to show the render window properties, unfold the Display section and switch from “Multitexture” to GLSL. At last, the shadow texture is on our cube. You can now head over to Photoshop, Gimp, Pixelmator or whatever image editing tool you like best and tweak your shadow map.
Of course a cube is pretty boring. Go ahead and use something more interesting yourself as an exercise. If you run into problems, check these things:
- Did you really assign an image to the UV map or just create one?
- Is the layer the object is on selected in the render panel?
- Do you have an active UV map for the object?
- Did you save the image after baking?
- Have you changed the texture mapping to use the object UVs?
If you’ve found this while searching the net for a solution and this helped you, drop me an email. It’s nice to know the time writing it down was well spent… – Alex
Leave a Reply