My Favorite Recipes
for iPhone (and iPad soon)
Introduction
My Favorite Recipes has been created out of a simple observation: There are a number of apps in the AppStore for other peoples recipes, but why is there none for our own?
That was in the late of 2008. A lot has happened since then! I’ve maintained the app for many, many years but as some point iOS and its devices had change so much that it simply wasn’t feasible to work with the old code anymore. But now with version 2.0, the app is back! It still is based on all the great community feedback I got over the years but from a technology standpoint, this is a complete overhaul: a new design that fits iOS 12, iPhone & iPad support, better sharing support, dynamic type support … the list goes on and on.
One of the main goals is still that the app should behave like one of the apps that originally ship with an iPhone. This means:
- Stability: No crashes or I don’t release it
- Sleek UI: The Apps I use the most don’t have much bling but instead are great to use.
- Content: Instead of shipping with hundreds of recipes, I made it easy for people to add and share recipes.
If you’re looking for an app with many pre-installed recipes, this is not the app for you. But if you want your own personal collection of favorites on your iPhone, you’re in for a treat.
Import
Since My Favorite Recipes is an app for your personal recipes, the main question everyone has is “how do I get my recipes in there”? Well, there are multiple ways:
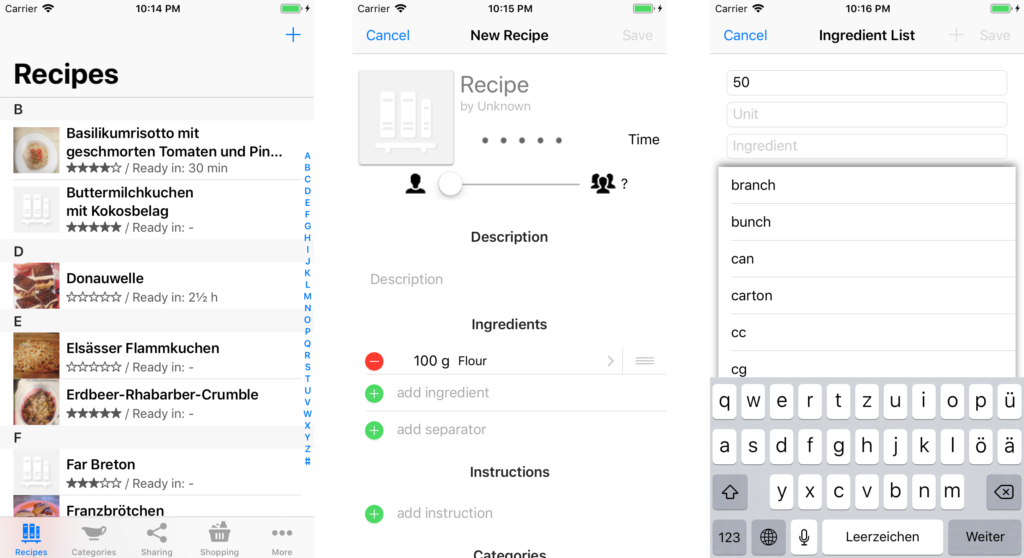
Manual Entry
A lot of care has been put into making manual entry as fast as possible. If you’ve got 100 recipes you want to get into the app, this is probably not the way to go. However, in the typical case that you discover a new recipe, adding it to your collection will be quick and easy.

File Import
A lot of users have purchased the app as a mobile companion for an existing desktop application they already own. They enter and manage recipes on their desktop enjoying the comfort of a large screen and hardware keyboard, then transfer them to the app to have them available on the go.
There is a wide variety of desktop recipe managers (Kalorio, Rezkonv, Mealmaster, …) that allow exporting their recipes to an export file format. If you’ve got such a program, check if it can export one of the formats supported by My Favorite Recipes:
- CookML (.cml): Modern recipe exchange format with a rich feature set. It is the only supported format that can handle images.
- Mastercook (.mxp): Rich exchange format but without support for images.
- Mealmaster (.mm): Very simple format, widely used in newsgroups and on recipe websites.
- Revkonv (.rez): Similar to Mealmaster but supports a wide range of measurement units.
Such files can be imported by the app as it understands their structure and the information contained in them. To get the file on your device, you can either:
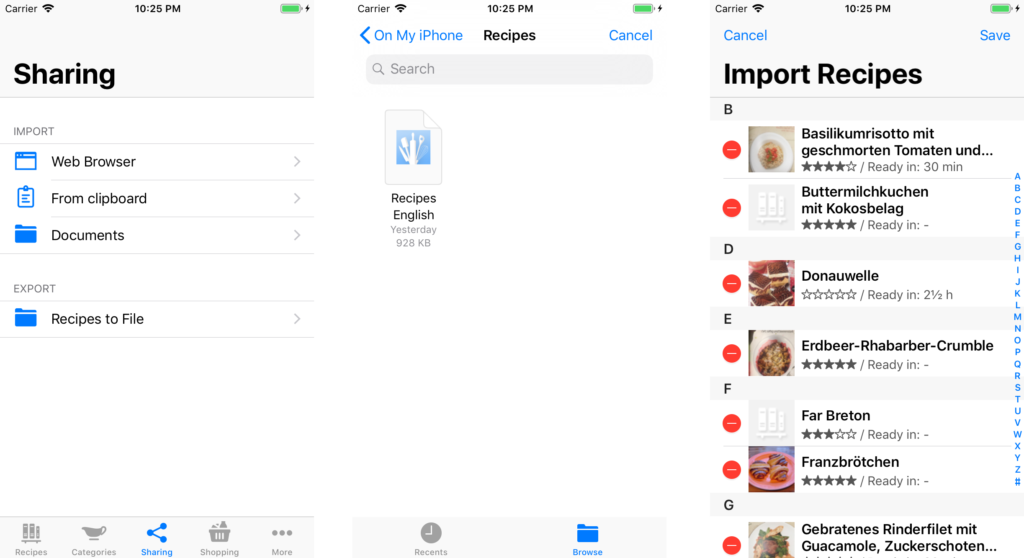
- iCloud Drive: Use the finder on your Mac to locate the iCloud Drive folder and store a recipe file in there. Then on your iOS device, open the app, go to “Sharing” and the “Documents” entries in the import section.
- iTunes: Attach your device to your computer, open iTunes and choose your device from the left side bar. In the device’s synchronization settings, choose the Apps tab and scroll to the “File Sharing” section at the bottom of the page. Upload a file to Recipes and then use the documents button in the Sharing tab inside Recipes.
- Email: Send it to your device as an email attachment, then tap and hold on the attachment until the “open in” dialog appears” and choose Recipes.
- Wifi: Use an app such as ifiles to establish a wifi connection and upload the file to that app. From there, use the “open in” functionality to again send it to Recipes.
If you have files in a different format, just drop me an email and if it’s viable, I’ll try to add an importer for your format as well. Note: for this to work, I need a specification of the file format. So if the manufacturer of a desktop recipe app uses a proprietary, secret format I won’t be able to support it.

Web Browser
If you are looking for new recipes, try the web browser integrated into the app. It behaves like the standard web browser you know but constantly parses the websites you look at and tries to detect a recipe. If it finds one it understands, the import button lights up. Pressing that button stores the recipe on your device.
Unfortunately, this cannot work for all websites that exist since each one has a slightly different format. However, there are two cases where the browser works just great:
- Recipe Meta HTML-Markup: The owner of a website can add special recipe meta information (i.e. Microdata, Microformat or RDF) to the HTML code of his website and mark which part describes the ingredient, which part the author and so on. My Favorite Recipes can use that additional information to understand the recipe and import it correctly. One great way to find websites that have this meta information is Google Recipes.
- Embedded Exchange Format: A number of sites have a button or link to view a recipe in Mealmaster or one of the other supported recipe file formats. Again, if the app detects such content, the import button lights up. If the user taps on a link to a recipe file that it understands, the import will start automatically.
Note: I specifically did not want to integrate any mass-rip off functionality. The browser is just there to save you the time of having to write down the recipe manually. Please respect the copyright and terms of use of the recipes you import and contribute to the site you found it on.
Recipe View
At the heart of the app is of course the recipe view. Each recipe can have various additional data: a general description, a 1-5 star rating, author, number of portions, categories, list of matching recipes, matching drinks, required time.
About half of those items are only visible if there is actually data set for them. Otherwise they are not shown to avoid clutter. Here are a few other things that you may not have noticed yet:
- Tap on the image in the upper left corner to see a full-sized version.
- You can use the portion slider to adjust the recipe to the number of people you are cooking for.
- Tap on an ingredient to check it off. This is very helpful to not forget something when doing a complex recipe.
Each instruction step can have an optional image. Again, the instruction can be tapped to check off that step.
In the top navigation bar, there are two buttons: One let’s you share a recipe, the other puts that recipe with the currently set amount of portions on to your shopping list.

Shopping List
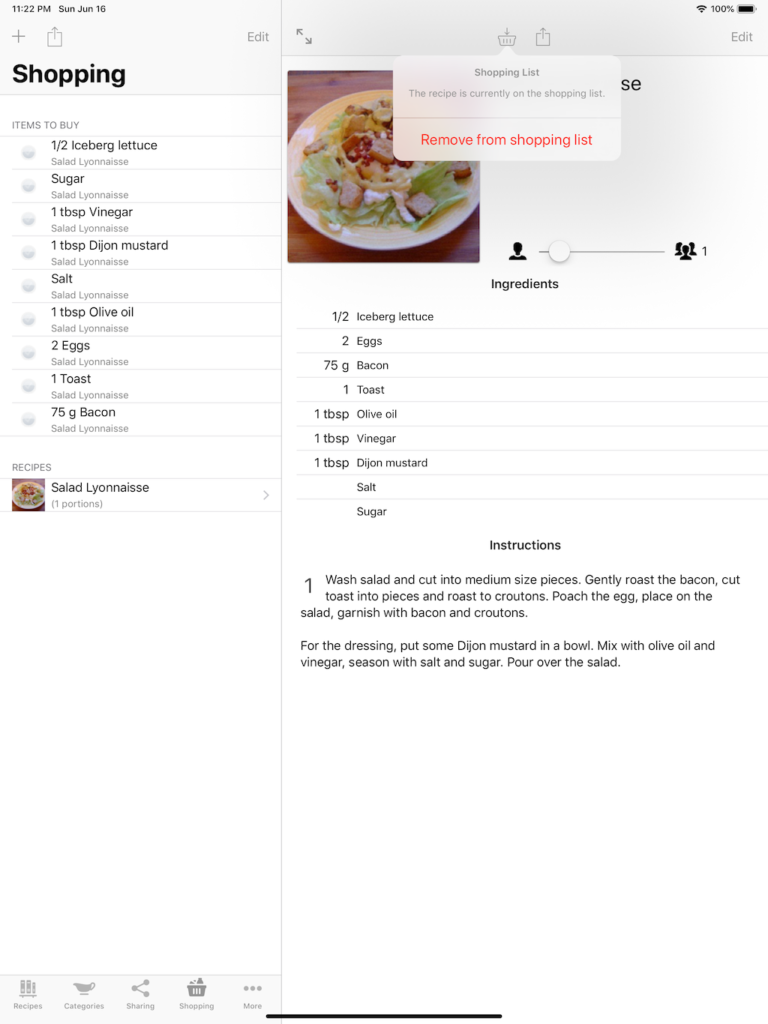
Shopping for ingredients is of course an essential part of cooking, so we put a shopping list directly into the app. The list is split into two parts: First the list of ingredients and then the list of recipes. To add a recipe to your shopping list, you can either tap “Edit” and the “add recipe” entry at the bottom of the list or use the aforementioned shopping list button in the Recipe View. For each recipe, the app will automatically create an entry for each ingredient required for that recipe.

Instead of adding a complete recipe, you can also add a custom item by hitting the plus button in the upper left corner. This is useful for adding that cart of milk that you wanted to buy anway or whatever else comes to mind. Each ingredient entry can be tapped to check it off. Once all ingredients for a recipe are checked off, the recipe itself will become checked off as well. In case someone else is going to do the shopping, you can export your shopping list as an email under the “Sharing” tab.
Feedback
Anything missing for you? Drop me an email. This is mainly a hobby project, so I cannot promise anything. But for quite a while now this app is mainly driven by user feedback. So let me know what it would take for you to give me a five star rating in the AppStore. Speaking of which: You do really help me by writing reviews if you enjoy the app…
FAQ
Q: Will there be an iPad version?
A: Starting with version 2, the app is now a universal app. So with a single purchase, you get both the iPhone and iPad version. Note however, that I haven’t implement iCloud Syncing yet since this will take quite some time to get right. In the meantime, the easiest way to transfer recipes is to export them as CookML files (that format supports images), put them on iCloud Drive and then import then on the other device.
Q: Is there a desktop version for PC/Mac?
A: Currently not. We actually started writing a simple one for Mac but didn’t feel that happy with it. That’s why we rather recommend using one of the establish recipe desktop programs out there. However, with the new features Apple announced for iOS 13, it might be possible to also get this app running on the Mac. The promises yet, but I’m curious to see if I can make that work.
Q: Why doesn’t the App support format xyz?
A: Probably because I haven’t heard if it yet. The app started with just MealMaster and CookML support, all other formats were added following user requests. If you’ve got some format that is not supported, just drop me an email and I’ll see what we can do. Note however that quite a number of recipe apps use proprietary, secret format so there is no way for me to support them. If there is a public specification of a format available, it should be easy to add a new format.
Q: What’s the red badge on the App icon?
The red badge added to the App Icon in the home screen symbolizes the number of items on your shopping list that are unchecked. If you don’t want it, use the system settings to turn of notifications for the app.
Q: The MealMaster recipe looks all wrong, some of the ingredients ended up in the description. What happened?
The MealMaster format follows a very strict format. Make sure the indention is correct (amount on the first 7 characters, then a space, then two characters for the unit, then a space, then the ingredient name). A number of programs/websites incorrectly drop some of the indention. The import has been made more robust in version 1.1.
